
On this blog, I often return to the topics of authentication and security as they are among the most critical parts of any application.
Fortunately, .NET provides a wide range of tools we can use to implement secure authentication tailored to our needs and technologies.
So far, we’ve mostly explored custom solutions that required building everything from scratch. However, this time I’ve prepared an easier approach for managing users.
In this post, we’ll cover how to get started with ASP.NET Core Identity.
ASP.NET Core Identity
ASP.NET Core Identity is the built-in framework in ASP.NET Core that simplifies handling user accounts.
It provides ready-to-use features like registration, login, password management, role-based authorization and more.
Instead of building authentication and user management from scratch, Identity gives you a secure and extensible framework that integrates seamlessly with ASP.NET Core applications.
You can store users in a SQL Server database by default, but it also supports customization to fit any data store or authentication provider.
Regardless of applications size, ASP.NET Core Identity is great way to get started quickly and securely.
Getting Started
The easiest way to get started with ASP.NET Core Identity is using EF Core, because it simplifies setup, which is exactly how we’ll approach this getting started guide.
To get started with ASP.NET Core Identity with EF Core, you need to install the NuGet package. You can do this via the NuGet Package Manager or by running the following command in the Package Manager Console:
Install-Package Microsoft.AspNetCore.Identity.EntityFrameworkCoreBefore using Identity, let’s set up a minimal ASP.NET Core application:
var builder =WebApplication.CreateBuilder(args);

builder.Services.AddEndpointsApiExplorer();
builder.Services.AddSwaggerGen();

builder.Services.AddDbContext<ApplicationDbContext>(o =>
{
    o.UseNpgsql(builder.Configuration.GetConnectionString("Database"));
});

builder.Services.AddAuthorization();
builder.Services.AddAuthentication()
    // In case you are working with cookies
    // .AddCookie(IdentityConstants.ApplicationScheme);
    .AddBearerToken(IdentityConstants.BearerScheme);

var app = builder.Build();

if (app.Environment.IsDevelopment())
{
    app.UseSwagger();
    app.UseSwaggerUI();
    app.ApplyMigrations();
}

app.UseHttpsRedirection();

app.Run();
This minimal setup includes the AddDbContext, AddAuthorization and AddAuthentication methods, which are essential for enabling Identity features.
IdentityDbContext
The next step is to create our user class, which will represent the identity entity in our application:
public sealed class User : IdentityUser
{
    public string? FirstName { get; set; }

    public string? LastName { get; set; }
}
IdentityUser is the base class provided by ASP.NET Core Identity. It contains all the essential properties required for authentication and identity management, such as:
- Id
- UserName
- PhoneNumber and more
Next step is to setup our dbContext:
public class ApplicationDbContext(DbContextOptions options) : IdentityDbContext<User>(options)
{
protected override void OnModelCreating(ModelBuilder modelBuilder)
{
base.OnModelCreating(modelBuilder);
modelBuilder.Entity<User>()
.Property(x => x.FirstName)
.HasMaxLength(20);
modelBuilder.Entity<User>()
.Property(x => x.LastName)
.HasMaxLength(20);
}
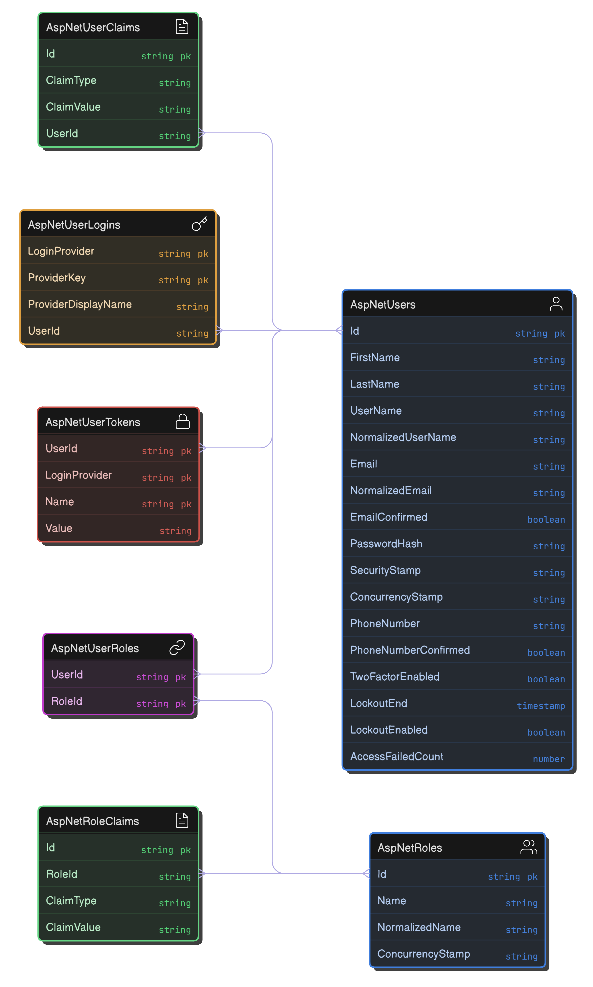
}What is special here is that instead of inheriting from DbContext, we are going to inherit from IdentityDbContext.
IdentityDbContext is a preconfigured DbContext that includes all the tables, relationships, and entity sets needed to support ASP.NET Core Identity:
Lastly, we need to update Program.cs with additional configuration:
builder.Services
    .AddIdentityCore<User>()
    .AddEntityFrameworkStores<ApplicationDbContext>()
    .AddApiEndpoints();

var app = builder.Build();

// ...

app.MapIdentityApi<User>();
AddIdentityCore
AddEntityFrameworkStores<ApplicationDbContext>() configures Identity to use EF Core for persistence. This wires up EF Core to handle CRUD for users and roles in the database.
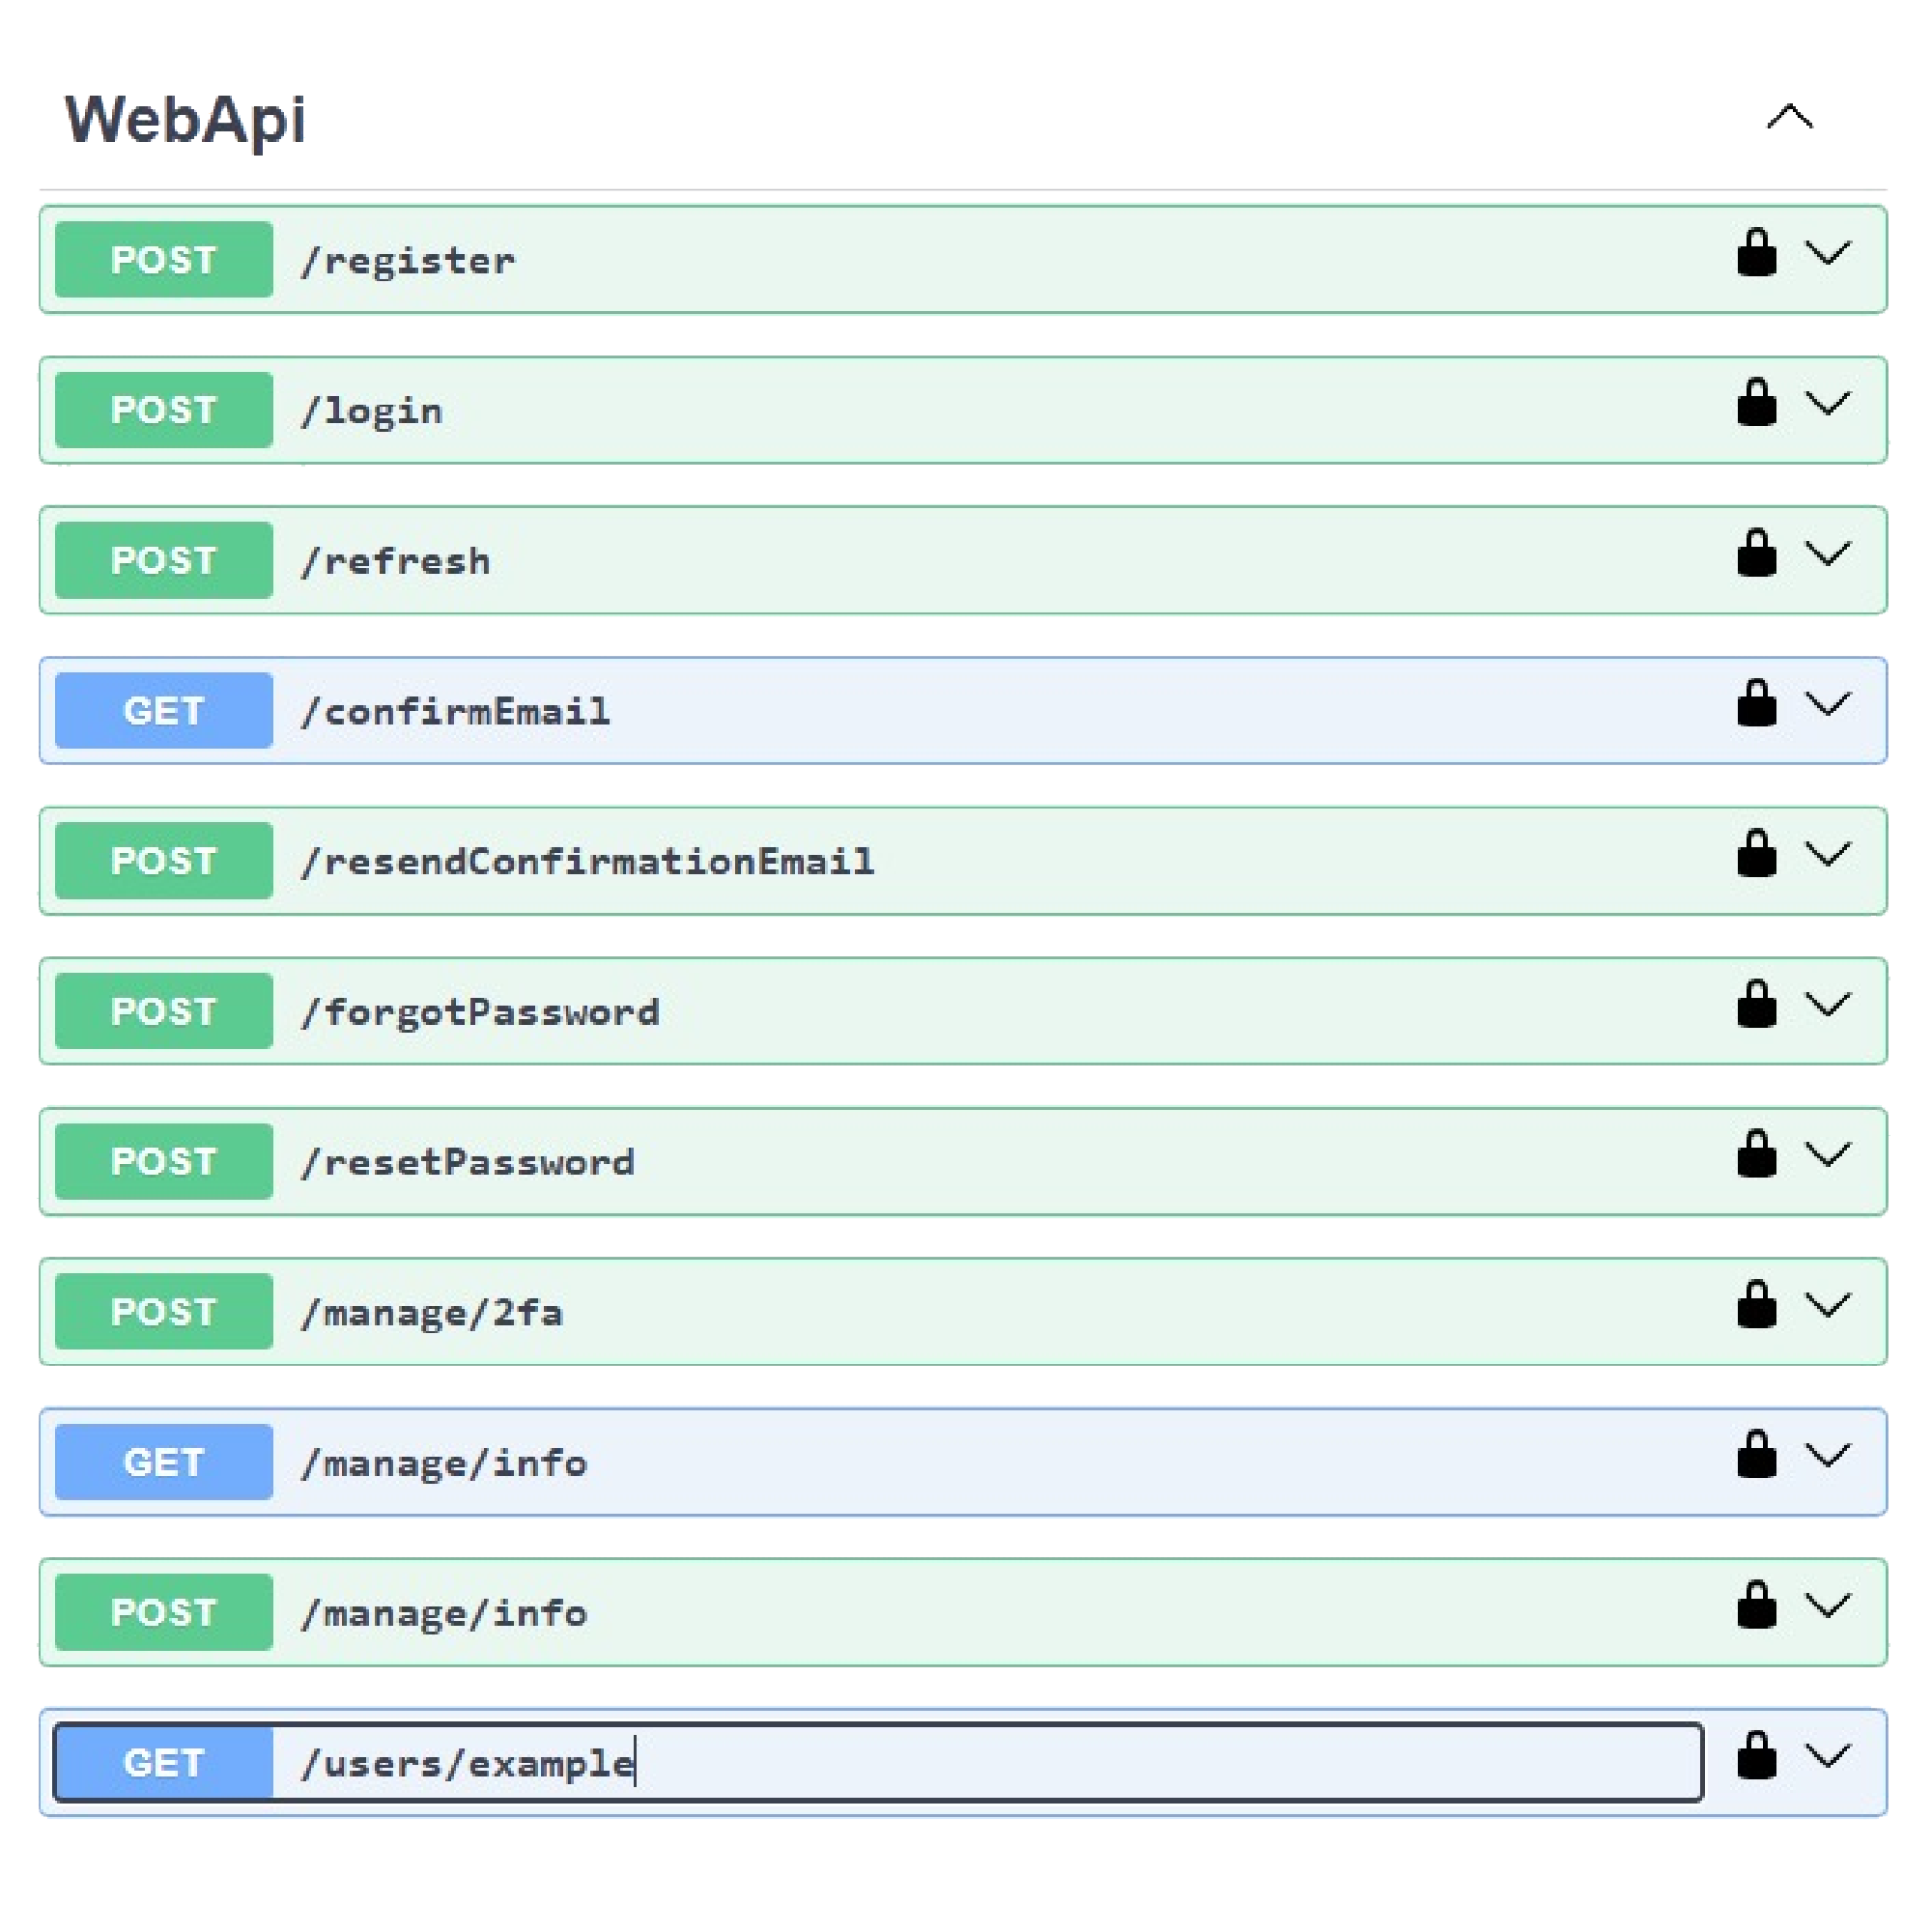
AddApiEndpoints() comes with .NET 8 and simplifies work with predefined endpoints for registration, login, logout and more.
MapIdentityApi<User>() maps the prebuilt Identity endpoints to your API.
Now your application is ready to rock:
Conclusion
ASP.NET Core Identity simplifies user management and authentication, providing a secure foundation out of the box.
You can quickly set up registration, login and role management without building everything from scratch.
This approach saves time and reduces potential security pitfalls, letting you focus on your application’s core features.
If you want to check out examples I created, you can find the source code here:
Source CodeI hope you enjoyed it, subscribe and get a notification when a new blog is up!